Thursday 11 September 2014

Lime Rendering

September 8th. So, having only taken the punch-and-judy tarps off recently to expose the straw walls, I have been busy covering them with lime render. It's a great shame that this is necessary; it would be great to leave the straw exposed. I think a roof overhang of about two metres all round would be sufficient. It would also save a lot of work.

Luckily I have had a lot of help this week; new POOSHer Greg has been here all week, and I had 9 friends here on Saturday and 3 on Sunday. And dry weather all week. As a result, the exterior render is over half way done.

First job: stuff the holes.

Second job: trim loose straw with a hedgecutter. "Before" and "After" photos


It didn't look greatly different, but there was a lot of straw on the floor, and it would have needed more lime if it had been on the walls.

There is an inspiring quote on the POOSH site that goes: "If you're not sure how to do something, start!" So, I've read all I can about lime rendering, but I've only done a couple of hours before, and it kept falling off the wall. But there's nothing to be done now except get on with it!


First time I have mixed lime putty. It's wonderful stuff - much stickier than NHL mortar. Seems to be staying on alright. The photo below shows current POOSHer Greg adding a pot of lime putty to the mixer; the grid on top is useful for slicing a large block of putty up into strips.


POOSHers are sustainable building volunteers who come and help with a project in return for food, accommodation and work experience. It's a network similar to WWOOF that runs on the site www.thepoosh.org . All our POOSHers this year - there have been lots of photos of them - have been absolutely wonderful: good company, good guests (cooking, washing up, etc.) and hard working - I wouldn't have got the building up without them.

However, I haven't been overwhelmed by people wanting to come and volunteer here. I think I've had 9 all counted - and that includes 2 who came for one day only, and one friend-of-friend who registered on POOSH after coming here. So on Saturday, I had a "Lime Rendering Party" and asked lots of my friends to come. There were 14 people here, and I think they had a good time slapping on some lime. 

My (gloved) hands were covered in plaster all day, so thanks to Jim Froud for the pictures:


and one video!

Sunday 31 August 2014

Made of Straw


I have been taking the scaffolding down this weekend. Whilst I was at it, I thought I would take the side tarps down to take a photo of the building in its finished but unrendered state. When it's all covered in render, I will want to remind myself of what it's made of.

This is three months work. At the end of May, there was just the stem wall here.

It looks a little miniature here, so here's one with me in it, for scale:


And a side elevation:


It's a great feeling to get the site tidied up. Here's the two-tons of scaffolding ready to return to Suffolk:


and the monster truck needed for getting it there.


Monday 11 August 2014

Green Roof

August 11th. Planting the roof.

The roof has been taking longer than expected. I was hoping to finish around the 20th July - so running about three weeks behind schedule. Adding the skylight was a late addition to the plan, and other aspects have taken more time because of the size of the roof. At around 55 square metres, it is a giant; you could have a game of tennis up there.

On my last blog, I showed pictures of bulk bags of cockle shells and 3 - 8mm leca, and of the shells spread on the roofing membranes as a drainage layer. After completing the shell layer, I put a single line of flint cobbles around the roof deck. They are sitting on a layer of RFG to raise them up to be visible over the retaining boards.


Then it was time to mix the substrate - the lightweight growing medium for the plants. I was aiming for a substrate thickness of 2 - 3 inches (50 - 75 mm). My ingredients for the substrate mix were: 
  • 3 - 8mm leca. These are fired clay particles used as a lightweight aggregate or insulation. They look like cocopops.
  • Coir fibre. Sadly, I took no photos of the coir fibre before mixing. It arrives in 5 Kg blocks the size of a large shoebox. You add water to reconstitute it, and after you have added a lot of water and forked it over, you get a heaped wheelbarrow full of fibre from one block.
  • Expanded Perlite. Perlite is a volcanic glass with a high water content. When heated, the water evaporates and leaves a lightweight honeycomb glass structure. I used a 3mm grade.
  • Sharp sand
  • Crushed rubble. I put a mix of everything in here: all the remaining RFG, some mortar from the demolition of a garden wall (source of my stem wall bricks), crushed brick. It all had to be crushed with a tamping rod.
The mix evolved as I went along, mainly to make full use of the materials I had bought. It started out as: 3 leca, 3 coir, 1 sand and 1 perlite (= 4 buckets); by the end, the final mix was 2 leca, 4 coir, 1 sand, 1 rubble and 1 perlite (4.5 buckets). The whole roof took around 55 mixes, roughly 1 mix for each square metre of roof.


Crushing rubble


Loading the forced action mixer with coir.


Two or three minutes later, filling sacks with well-mixed substrate.


No, I haven't got a hoist!


Using roofing battens on edge to regulate the depth - approximately.


Last strip of substrate. Actually, you can see I have already planted some of the roof here, but I'm going to go back a step to talk about the plants.

Plants: We want some drought-resistant,  ground-covering plants for the roof, to hold the substrate in place and green the upper surface. Sedum is recommended. You can buy beautiful ready-grown sedum mats and unroll them on your roof, but with 55 square metres of roof to cover this would cost thousands of pounds, so we have another plan.

We asked our friends what they had. In some cases, we were even cheekier and asked people we didn't know if they could spare some plants! We were very kindly given a large tray of creeping thyme, a small tray of semper viviens, and as much wild sedum as we could dig up.


This is our source of sedum. It's a concrete road circa 1941 on an old USAF Norfolk airbase, currently used for storage of potentially recyclable materials. We bagged up a small proportion of this.


Then we divided the clumps, and planted plugs of plants at 9 inch separation over the whole roof area.


Until it looked like this:


With thanks to the roofing crew: Chris, Adam & Izzy. 

Wednesday 23 July 2014

Roof, Doors

22nd July

It's a couple of weeks since I have posted, but work has been continuing. There were a few days rest after I got the edpm cover on the roof.

I've added eight of these storm straps linking rafters to the wall plate, which I hope will keep the roof firmly attached in a gale. The roof weighs at least a ton already, and will increase to over 3 tons with substrate and plants, so it's hard to imagine it going anywhere, but it is almost 60 sq metres, so quite an area to catch the wind.


This is a job I should have done before building the walls! I've made a door frame. The posts are 3 pieces of 4 x 2 timber, and I've put a 6 x 2 beam under the wallplate to try to stop it sagging from the weight of the roof above.


 Door liners added:


 My wall sections ends are a bit ragged (which is why I should have added the frame before I built them) so I have closed the gaps with a bit of feather edge cladding:


...................with sheeps wool insulation stuffed into any gaps.


Apologies for photo quality - it's hard to get a decent snap in bright sunshine.


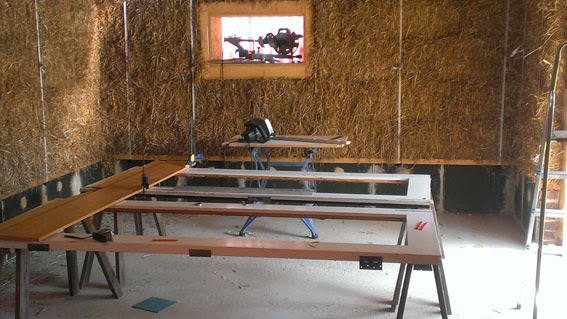
Then the doors. These are recycled patio doors from the house, installed in 1975, internalised during the 1980's and removed last year. I need to reduce the height by around 150mm, and the width by about 10mm, hang them plumb and square.


It may not look much, but the frame and door hanging was a week's work.

So, do you like my skylight?


If you are reading this because you are interested in sustainable construction, then you probably don't think a lot of it. It's a twin wall polycarbonate dome skylight on a 150mm pvc upstand


I have had to cut a hole in the edpm pond liner, lap it up the upstand and apply flashing tape to try and keep it watertight. I'm way out of my comfort zone here! I would of course prefer something made of wood, glass and linseed putty, but I spent many years in houses with leaking skylights, and I think the chances of one that's been fitted by me on what is practically a flat roof keeping water out are very slim. The dome is like an umbrella, and is better-designed than anything you could make out of flat glass for this application.


28 July Weather - hot, dry and windy. POOSHers: - haven't seen any since June 14th.

Roof work continues. I have been gluing down the edges of the pond liner with contact adhesive, a slow, difficult and messy job made difficult by strong winds. 


Followed by attaching a retaining board around the whole roof. I have used 6 inch gravel boards, tanalised. I made a compost box with these a few years ago and they are very durable when in contact with damp vegetation.


By some trick of camera colour compensation, the next photo does not look very different. In fact, the one above shows a black edpm liner, a synthetic rubber waterproof membrane. The photo below shows another layer of light grey geotextile membrane which I have used to cover the edpm and protect it from sharp stones, roots etc. 


 I have run the geotex up the retaining boards. It is water permeable, so water will drain off the lower edge of the roof and the substrate will stay where it is, unable to pass through the geotex.


I have bought a bulk bag of cockle shells - a food industry by-product; and, below, an even larger bag of leca (expanded clay).


These are both lightweight materials that I will be using on the roof for the plants to grow in, the substrate.

It's a layer of shells first, to act as a drainage layer:


I've also been using some leftover recycled foam glass gravel around the edge, and some 20mm gravel that was left over from the foundation trench fill. Pretty much anything can go on!. Crushed bricks, old mortar, sand, soil, all mixed with the lightweight aggregates I have bought: leca, perlite and coir fibre.